How to Drive British Railway
Cab discipline for scored routes—power, brake, doors, and signals working as one loop.
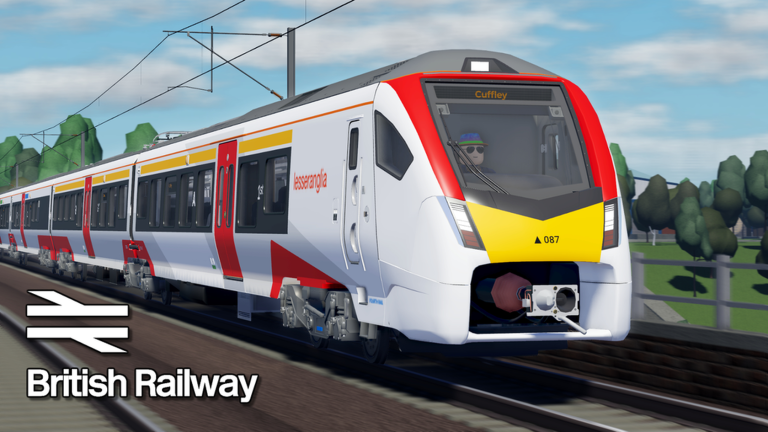
Driving in British Railway (Roblox) by Fourth Rail is a scored craft, not a traffic sandbox. You are paid in Coins through route performance while sharing track with Guards, Passengers, and other Drivers on a live server. This guide focuses on cab workflow: power, braking, station work, AWS, and crew communication after the getting started basics.
Cab setup before you take power
Know your traction type. Some units need a pantograph (P); bi-mode stock may need the diesel engine toggled (O). Unlock panels with U when the UI expects it. Confirm doors and local door (R) behaviour for your class—version 1.4 emphasised class-specific door procedures, so a habit that worked on one unit can fail on a Class 150, 230, or 180.
Bind awareness checklist (desktop defaults):
- W / S — notch throttle up / down
- A / D — apply / release on separate brake-handle trains
- E — emergency brake (last resort, not station craft)
- T — doors in context; also respond to Guard buzzer workflows
- H / Y — more Guard-sided, but Drivers must recognise whistle and bell meaning
Keep the controls page open until muscle memory sticks.
Power and brake philosophy
Think in advance of the next restrictive signal, not the one you already passed. Throttle up only when the road and the timetable idea both allow it. Brake early enough that you are not relying on E. On separate-handle stock, A/D lets you shape a stable approach; slamming emergency every platform trains bad habits and unsettles Passengers.
Speeding more than about five mph over the relevant limit feeds penalties. Coasting into a Caution aspect toward roughly 45 mph is calmer than holding line speed until the red fills the windscreen. Full aspect language lives in signals and SPAD.
Station stops and score
Each clean stop is worth +10 score. Approach with a planned brake curve, stop aligned for Passenger exchange, run the correct door procedure for your class, and wait for safe departure cues—including the OFF indicator culture around platform safety. Skipping stations is a direct score wound and breaks Passenger Coin loops (six Coins per stop for them).
If a Guard is aboard, do not treat doors as a solo speedrun. Their procedure Coins (five per stop procedure, tickets up to forty at four each) and the roughly +2 score per stop bonus exist because the game wants cooperation. Read how to guard so you know what they need from you.
AWS, SPADs, and professional pride
Acknowledge AWS; ignoring it is a listed penalty path. A SPAD—passing Danger—costs three score points and often the respect of the server. If you are unsure, brake to a stand and re-read the aspect. Preliminary caution is your early warning; Caution is your slow order; Proceed is not a dare to outrun the next board.
Ghosting changes from v1.4 matter when traffic densifies. Drive as if another train’s windshield is real even when visibility tricks you. The Updates Hub is the patch source of truth when players argue about “old” sighting rules.
Working with a Guard’s buzzer and bells
When a Guard signals with Y or related buzzer flow, answer with the expected T/buzzer response rather than guessing with power. Departure should feel like a short protocol: doors secured, OFF/safety context respected, Guard content, then power. If Looking For Guard / Friends / Other lists are available, using them usually beats driving silent and frustrated.
Route selection and stock choice
Beginners should pick forgiving routes from the routes tier list before Brynmouth coastal complexity. Stock-wise, compare units on the trains tier list. New v1.4 trains are exciting, but a familiar brake feel beats a glamorous cab you cannot stop.
When a run goes bad
If you have already stacked score above ten and the route is doomed—SPAD chain, wrong road, disconnecting Guard—remember partial payout on early leave. That is kinder than forcing a zero. Math and penalty tables sit in score and penalties and how to earn coins.
Practice drills that raise payout
- Drive one route at deliberately lower speed focused only on zero SPADs.
- Repeat the same route aiming for every station stop without door mistakes.
- Add a Guard and practice buzzer/door timing only.
- Introduce bi-mode or pantograph tasks once the core loop is stable.
- Review signals and SPAD after any penalty you do not understand.
Related pages
Return to the Guides Hub for the full set. Economy framing: coins and shop. Role framing: roles overview. Codes are not a driving shortcut—the Codes Hub currently has no active promos. Community links: wiki.
Drive as if the next red is already waiting. Coins follow clean score; clean score follows patience.
Frequently Asked Questions
Quick answers for British Railway drivers, guards, and passengers.
What keys control throttle and brake?
Desktop defaults use W/S for throttle and A/D for brake apply/release on separate-handle trains, with E for emergency.
How much score is a station stop worth?
A successful stop adds +10 score, with extra roughly +2 per stop when a Guard is contributing.
What should I do on a Caution aspect?
Plan a reduction toward about 45 mph and be ready for a more restrictive signal ahead.
Do I need pantograph or diesel keys on every train?
No. P and O matter on stock that uses overhead or bi-mode systems—check your class before departure.
Can I still get Coins if I abandon a route?
Yes, leaving early with score above ten yields a partial payout instead of a total loss.